Hello Friends! I created a birthday card for the Newton's Nook Inky Paws Challenge #229 Birthday.
Wednesday, August 7, 2024
Newton's Nook Inky Paws Challenge #229 Birthday!
Monday, October 23, 2023
{BYSHC} Falling for the Holidays 2023 Linky Party - I'm on a SCRAP ROLL!
Hope you all aren't tired of my scrap backgrounds yet! I've got a ton of them on my desk at the moment! {BYSHC} Falling for the Holidays 2023 Linky Party has plenty of days left for more of them! :)
Friday, September 22, 2023
Sketch 37 still going strong!
Mid-September and Sketch 37 is still going strong! {BYSHC} are working hard to keep the year long process of Christmas card creating fun and exciting!
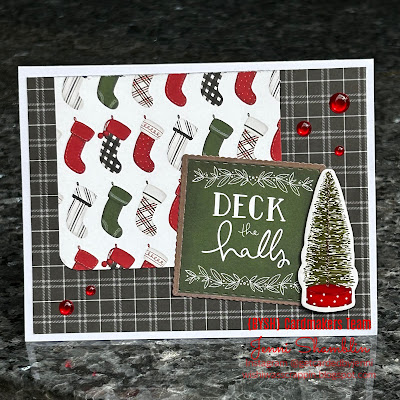
Today's card (much like the last one) felt somewhat like a cheat! But.....it's perfectly ok to let the paper and embellishments do all the work!!
Started with a white card base, measured and cut the patterned paper according to the sketch! All papers and chipboard embellishment are from Carta Bella Home for Christmas. I used the scallops and squares nesting dies from Unity Stamp Co to cut out the sentiment and I also added some red foil enamel dots from Gina Marie Designs.
Doesn't need to be hard to be beautiful! And your family and friends will appreciate it either way! :)
{BYSHC} Sketch 61 - Let it Snow!
Hello and welcome to September! The first of the "ber" months! Sketch 61 goes through the end of the month so be sure to get any a...

-
Scraps you say?!? I am currently surrounded by bags and bags of scraps! I could do this prompt forever! The Friends of Unity April Blog Hop...
-
Here we are...September! Whew that was fast! The Friends of Unity are hopping again! This month is a color challenge! Just in time for all t...
-
Hello and welcome to the CropChocolate.com DT Blog Hop! If you have happened to stop by and wanted to start at the beginning, go to Amb...


