Showing posts with label #inkblending. Show all posts

Wednesday, November 27, 2024

Growing in Unity - Day #3

Half way through the week! Whew, that was fast! Since discovering Unity, I have learned so many techniques. I have also learned a bunch of things on Pinterest. It's a great place to find inspiration for all the things! 

I have done this technique before...white embossing, ink blending....but I found this set of cards on Pinterest and thought I had to give it a go! I have a bunch of Birthday's kicking off my new year, so Birthday cards are on my mind!

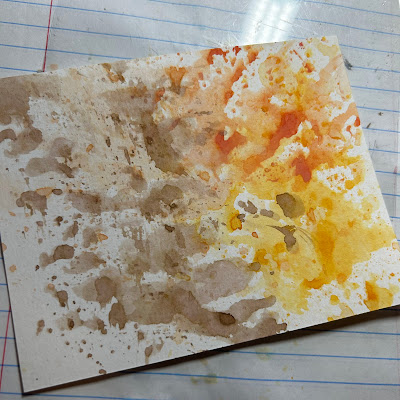
This card started as a full sheet of watercolor paper. I cut it up into 4 - 4 1/4" x 5 1/2" panels. Since it happens to be "UNITY MEMBERSHIP MAKES," I grabbed a large mandala that happens to be from the February 2017 Kit of the Month. I purchased it second hand. I stamped this large stamp using VersaMark embossing ink and my Misti so that I could be sure the image was stamped fully and ready to accept embossing powder! White embossing powder and a heat gun, then on to the ink blending with some Salvaged Patina distress oxide. I then wiped the excess ink off of the embossing, then sprinkled some water on to give it depth. 

I then found a strip of patterned paper and added it to the edge, then a strip of black cardstock to divide the edge. Happy Birthday (from gotta love sentiments) was stamped with versamark and embossed with white embossing powder.

I added some white enamel dots from Gina Marie Designs and it's done! I plan on making more of these in different colors!

Don't forget to comment to have a chance to win one of two $20 gift cards to Unity!

Saturday, September 21, 2024

Inky Paws Challenge 232 - Fall Birthday

 I managed to create another cozy fall birthday card for the Newton's Nook Designs Inky Paws Challenge!


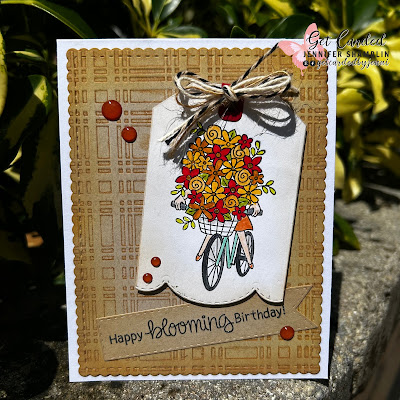
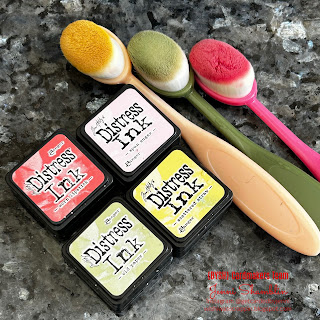
Started with a  Spellbinders embossing folder...plaid company...to which I added some vintage photo to one side and then embossed a piece of kraft cardstock. I ink blended around the edges with first some wild honey, then more vintage photo, then die cut with the largest scallops and rectangles nesting die set from Unity. Onto the image! The stamp set is from NND, called Loads of Blooms. I'm sure this is meant to be a "spring" stamp set, but just change the colors and viola it's fall! :) After I stamped it onto white cardstock, I die cut it with a tag die set called fancy edges tag die. Colored according to the inspiration picture....reds, oranges, yellows, greens. Sentiment is also from that stamp set and was stamped onto kraft, embossed with clear embossing powder, then die cut using a stitched banner die from Unity. Ink blended around the tag and the sentiment with some vintage photo. Tied on a few colors of twine, burlap twine (MayArts Ribbon), and two colors of bakers twine (Timeless Twine by BellaCreationz). Popped it up with some foam adhesive and added some enamel dots for an extra shine.


Not sure I have another one in me today, but you just never know! :)


Inky Paws Challenge #232 - Cozy Fall!

 I struggle with fall cards...."fall" in Florida is basically the same as summer! Also, I don't typically send fall-ish cards! Soooooo, BIRTHDAY CARDS it is!


I created the plaid background based on the inspiration photo. Evergreen bough, festive berries, scattered straw and tea dye are the colors I used. I blended over a plaid builder stencil by Unity Stamp Co. Then I splattered some watered down white acrylic paint and some distress stain in vintage photo.  I die cut the panels with a Tim Holtz nesting die set called Stacked Deckle. Then I ink blended around the edges with more vintage photo and arranged them as I thought would look best. On to this cuuuuute mouse!! This little guy is from Newton's Nook Designs set called Garden Mice. Colored with some kingart alcohol markers and then used the matching die set to cut him out. The sentiment is from an older NND set called Simply Sentimental (sorry, it's no longer available). Stamped onto kraft with versamark and white embossing powder then tore the ends. Added some enamel dots, a cute little paperclip and a couple little accent flags for extra detail! Hope you like this one! It took awhile for me to figure out what to do! LOLOL


Saturday, September 7, 2024

~ September 2024 Friends of Unity Blog Hop ~ Color Challenge!

Here we are...September! Whew that was fast! The Friends of Unity are hopping again! This month is a color challenge! Just in time for all the fall/thanksgiving cards! 
 If you have arrived here from Jane's blog and wanted to start at the beginning.....you can click here to be taken to Crystal's blog!


Living in Florida, doesn't give much of this color pallette during the fall! I am originally from Southeastern Lower Michigan so I have experienced it in my lifetime but definitely missing the beautiful colors, crisp fall air, cider mills this time of year!


Unity Background of the Month August 2024 ...rustic foliage, stamped onto ink blended panel. 


I started with a piece of white cardstock, then blended scattered straw, wild honey, crackling campfire, walnut stain and black soot, around and around blending as I went. This is when I die cut it with the scalloped and stitched edge nesting die. The yellow got a little muddy when I went back in after I had stamped the background on. Sentiment from September 2023 harvest hues stamped in black onto kraft, die cut and mounted with foam adhesive, may arts ribbon burlap string and gina marie designs matte enamel dots.


Next is a completely different look, but similar fall colors.


Image and sentient from August 2024 KOM {thanks in all the things}. 


Started with a piece of white cardstock and stamped the image in black. Then started the coloring with Tim holtz watercolor pencils. I'm new to using these, so some of my colored parts don't really look like I had wanted, but all in all its a thumbs up!


 Spritzed some of the colors all over the panel. I then cut the colored panel with the largest rectangle from the scallops and rectangle nesting dies and then distressed it a bit with a distressing tool. I did ink blend around the edges a bit both before and after the distressing with walnut stain and some vintage photo. I added a white mat so that it popped a little more off the black background (also die cut with the largest scalloped rectangle), then added white bakers twine, clear dew drops.

Next is a card that I created using a background technique from Crystal from a few months back....double background stamping. 


The backgrounds I chose are September 2023 BOM ...off the grid and August 2024 BOM ...rustic foliage. Started with a white piece of cardstock. Stamped the grid using vintage photo. Next the fall foliage was stamped using several different oxides stamped all over to show all the colors! Crackling campfire, wild honey, vintage photo, scattered straw. After die cutting with the scalloped and stitched nesting die, I blended on some black soot along the edges. 


Typically I do not send a bunch of fall cards, so thought I would make this one a birthday card! These colors were perfect to create this monarch butterfly (from April 2020 Whit Kit grow. transform. evolve) which was stamped in black and then colored with Tombow Art Markers and some white uni-ball white gel pen and fussy cut. 


I popped up the top, but glued the bottom to the cardbase.

And last but not least, I created a card based on a card I saw on pinterest. It was an advertisement for Walmart so it did not have a name attached to it, so I cannot give credit.


When I viewed the original, it appeared to be ink smooshing in a few different colors, then a black silhouetted image on top of that. So that's what I went with! Colors are wild honey, scattered straw, walnut stain, tea dye, crackling campfire and black soot. Tree line is from December 2023 Whit Kit (radiant moonlit forest) and the sentiment is from April 2024 KOM {petal post}


This somber looking scene didn't feel like a "happy birthday" or a "happy fall," definitely feels like a sympathy card. I am very pleased with how this turned out!


This was midway through.


Thanks so much for visiting! If you've made it this far, congrats!! This was a long one! Next on the hop is Dawn!

Be sure to leave me some love, I am so thankful to hear your feedback! 

Thursday, July 25, 2024

Christmas in July 2024 {BYSHC} Linky Party - Non-Traditional Colors

 This card is a little unusual! I searched in Pinterest for "non-traditional Christmas colors" and this combo popped up! Love Love LOVE!! The Christmas in July 2024 {BYSHC} Linky Party is close to setting a record for entries! Be sure yours is entered before midnight on Friday!


As with another post from earlier this week, I am entering this into another challenge blog as well as this one! The Hero Arts Blog has their current challenge going called "color my world!" To me that means lots of colors! Vibrant, crisp, distinct!


This one came about with a lot of indecision on my part! Let me start at the beginning. I started off with a white panel of cardstock. I taped down a Hero Arts stencil from the Flower Swirls stencil pack. I started in the center with scattered straw, next I went to the edges with old paper. The middle is two different pinks, worn lipstick and spun sugar. As I said above I searched for "non-traditional CHRISTMAS colors" so when I finished with this I struggled to create a Christmas card. But I was determined, so I cut the panel in half and will use the other half for likely a birthday card! After I ink blended, I took some white acrylic paint thinned down and splattered it on. Then I added some distress mica spray in tarnished brass to an acrylic block and splattered that on as well. It's super sparkly! Since it shimmers so much, I found a piece of gold cardstock that I used as the base. Distressed the edges a bit and glued it on. Here is where the indecision came in......white or black "merry?" I cut both, put them both on and still couldn't decide. So I took the negative of the white and stuck the black die cut inside and it solved that! I used the die as a template for the outside. I drew around it with a pencil and then fussy cut it out! :) I stamped the "& bright" onto the gold and then embossed with clear embossing powder. I added some gems from PinkFresh Studio and it's perfect! :)


see how pretty it is!?!?


Thanks for visiting!!


{BYSHC} Christmas in July 2024 Linky Party - Silent Night

 Hello and welcome back! Today's card for the {BYSHC} Christmas in July 2024 Linky Party is another digital image from RAM Stamps!


I have again chosen the Nativity Scene Builder from RAM Stamps! 


This sweet set has the essential nativity participants! Mary, Joseph, baby Jesus, angels, wise men, farm animals and of course a manger and stable! As I stated previously I just was enlightened that digital stamps are meant to be manipulated to create a scene and change sizes!! 

After resizing and positioning the items on my screen as I wanted, I printed this onto white 60# cardstock and die cut using the largest scallop and rectangle nesting die from Unity Stamp Co. I then distressed the edges with a little vintage photo ink blending. The angel and blessed family were printed separately and fussy cut. All were colored with Tombow brush markers and some white gel pen. I attached the angel and blessed family using some foam adhesive. 


Somewhat simple but still just as meaningful!

Thanks for visiting and I hope to see you soon!

psssst...discount code from RAM Stamps! CHRISTMAS50


Wednesday, July 24, 2024

Christmas in July 2024 {BYSHC} Linky Party - Merry & Bright

 Happy Wednesday! The Christmas in July 2024 {BYSHC} Linky Party is still going! Friday at midnight is your deadline! Today's card combines two challenges!


The second challenge I'm talking about is at Hero Arts! Their challenge is called "color my world." I take that to mean lots of vibrant colors!!


I've taken their Flower Swirls Stencils, and the Merry Stamp & Cut to create this colorful card! The inks I used over the stencil are lumberjack plaid and twisted citron. After I removed the stencil I splattered some water on it to create a little distressing. The panel was then die cut with the largest scalloped and rectangle die from Unity Stamp Co. I then moved onto the sentiment. I die cut the "merry" from a scrap of white cardstock. Then stamped on the top and bottom part of the sentiment using WOW! Embossing ink and Gina K Designs white embossing powder. That black panel was then die cut with the scalloped and banner die set from Unity. Glued everything together then used some foam adhesive from therm-0-web to attach it to the background. Some green and red glitter enamel dots from Gina Marie Designs to finish it off!


Thanks for visiting!! Keep up the great work on these submissions! We are approaching a record number of entries!!


Wednesday, May 29, 2024

Unity Membership Makes Wednesday - Faith

 Wednesday's are my favorite days 1) because it's my day off, 2) because it's #UnityMembershipMakes day! I get to dig out all my fantastic Unity kits and make something magical! Unity's Show & Tell Facebook Group is a great place for inspiration!


I started this lovely card with some inspiration from Unity Design Team member Echo Noble! Started with a piece of white cardstock, to it I added one of my favorite techniques...ink smooshing! It is as fun as it sounds! 


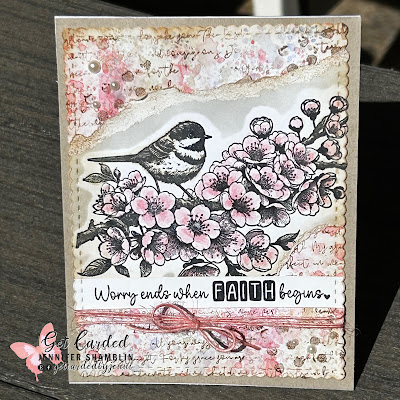
I took these three colors of distress inks (old paper, worn lipstick, shaded lilac) individually (not together) and "smooshed" them onto a sheet of acetate, added water and carefully tapped the wet ink panel all over the white cardstock until I was happy with the coverage. *TIP* Dry each layer before adding another! You could possibly "blend" too much and the colors would get muddy! After I was happy with the color saturation I stamped a Unity Background Stamp called A Faithful Letter on top using distress oxide in vintage photo. To that I added a tiny dot stamp from the May 2023 Kit of the Month called {bloom in color} using distress ink in walnut stain. Next the panel was die cut using the largest scalloped and rectangle nesting die from Unity, then ink blended around the edge. The bird is from the April 2024 Whit Kit called Bloom for New Beginnings. I stamped it onto white cardstock with VersaFine Clair in nocturne. Next I took the same three colors of ink from above and smooshed them again onto a acetate sheet, added some water and used that (along with a water brush) to water color the image!  All Unity stamps come with a white backing sheet as part of the manufacturing process. I used the white backing paper to create a mask to ink blend over the image for a nice crisp edge! Once ink blended I tore the panel as close to the image as I could, then ink blended over the torn edge to create a vintage-y look. The sentiment is also from a Kit of the Month April 2022 {true colors}. I glued this die cut panel to a piece of kraft cardstock (also from Unity) and added some pink burlap twine and pearls to finish it off!


If you are not a member of the Show & Tell page, I strongly suggest you join! Not only is there a ton of inspiration from the design team members, but everyone! Create and post away!! Never know you could inspire someone today!

Wednesday, October 25, 2023

Falling for the Holidays 2023 {BYSHC} Linky Party - Peace & Joy

 We are on day 6 of the Falling for the Holidays 2023 {BYSHC} Linky Party! Getting closer to the end!

Today is Wednesday and at Unity Show & Tell (Facebook group) that means its Unity Membership Makes day!


What you can't tell from this picture is the entire thing SPARKLES! I started with a piece of watercolor paper. I then ink blended over it using Distress Inks in evergreen bough and peacock feathers, then finished with Distress Oxides in salvaged patina, hickory smoke. Once done I sprayed some water onto an acrylic sheet. I had plans to just splatter water over it, but then decided to just smoosh the water onto the ink and see what happened! I think it looks so cool!! I splattered some watered down white acrylic paint onto that to mimic snowfall. I then stamped the background stamp, which is from the Unity Stamp Co. December 2022 Kit of the Month called {a new chapter} on to the panel using Versafine Clair in Nocturne. This is where it went in a different direction than I had planned.....I had only wanted to emboss the stars with the glitter embossing powder, but 1) I failed to "anti-static" the panel and 2) the black ink was still wet! Once the glitter embossing powder was on more places than I had intended....I just sprinkled it all over! After the embossing powder was melted I die cut the panel with the largest scalloped rectangle from the scallops and rectangle nesting die set from Unity Stamp Co. The sentiment, which was also embossed with glitter is also from a Unity kit called ...cherished holly. While it's not a subscription kit it's still a specialized kit, November 2021 Unity Sentiment Kit. Mounted the die cut panel onto a black background and it's finished! While I was thinking that it was too simple, it pretty much speaks for itself! The video of the sparkle is amazing!! :)


Thanks for visiting! Be sure to leave me some love! :)


Saturday, October 21, 2023

{BYSHC} Falling for the Holidays 2023 Linky Party

 Welcome back! The {BYSHC} Falling for the Holidays 2023 Linky Party continues!


Another background that just wasn't the right color green and more reindeer! But I've added another element on top of the floral background.....a grid background stamp!


Started with a white card base then a plain white piece of cardstock was stamped with the Unity Stamp Co. background stamp called Tuscan Tile using Distress ink in Shabby shutters. I then stamped onto it a background called off the grid using distress oxides in antique linen and vintage photo. I die cut that panel along with a piece of brown cardstock using the Sizzix/Tim Holtz dies called Stacked Deckle. The green panel behind was distressed along the edge and then inked to show the distressing. The reindeer were stamped onto white with black and I thought it was a little too stark so I ink blended over them with vintage photo to darken them up a bit. I added some red twine and brads to finish it off. 

If we have learned anything.....if it doesn't work right now, save it because it will work for something else! :)

The party link will end on the 27th at midnight! 


Sunday, October 1, 2023

Hello October! Sketch 38 is up!!

 October 1st! WOW! As the holidays are quickly approaching it's a great time to get started on some cards! {BYSHC} has a sketch for that! LOL Either on Facebook or their blog, {BYSHC} is a great place for inspiration! Sketch 38 has begun and will last through the end of October! Even more fun in October is our Falling for the Holidays Linky Party happening mid-month! Prizes galore! (More info to come!)


This card sort of came to me in the middle of the night! I had the idea and put it together the next morning! I have always wanted to create a "winter sunset" with ink blending and thought I'd give it a shot! I absolutely LOVE how this turned out!

Pictured below is how this all started! I grabbed a piece of Canson XL watercolor paper and started blending! Antique linen, seedless preserves, faded jeans and black soot were my colors of choice (it's also what I have)! Blend, blend, blend until you get a blend you like! I then sprinkled some water on top to create the "snowfall."


After the blending process, I cut it according to the measurements on the sketch (pictured below). I then stamped the trees (from a Unity Stamp Co. set called winter wonderland walk) with Versafine Clair in Nocturne. White card base, black background, then a navy blue background. The inked panels were then placed onto a white background and the sentiment was stamped onto a piece of white and added. Embossed vellum circle, button and twine from my stash!

Absolutely love it!!

The Falling for the Holiday's Linky Party starts on the 20th! More details about sponsors to come!


Don't forget to link of Sketch 38 projects before the 31st to be eligible for the drawing!


Sunday, August 13, 2023

Creative Scrapbooker Magazine - Fall 2023!

 This feeling really never gets old! Creative Scrapbooker Magazine has once again chosen one of my cards for publication in their Fall 2023 issue!


Right here on page 126! Thanks from all of us was created with Unity Stamps and dies!


Stay tuned! I may just do it again! ;)


Friday, July 21, 2023

{BYSHC} Christmas in July 2023 Linky Party Kickoff!

 Welcome to the first day of the {BYSHC} 2023 Christmas in July Linky Party! So much fun to be had this next week! Starting today, running through the 28th, enjoy lots of posts and inspiration to get some Christmas cards made and ready for December! 


Today's card features a new-to-me technique of multiple background stamps and colors! So much fun to create this (and a few others)! The background stamps are from Unity Stamp Co. (which happens to be one of our amazing sponsors)! Started with a white cardstock panel cut to 4.25" x 5.5". Stamped the Linen background stamp using weathered wood distress ink. On top of that I stamped the Santa Express background stamp using a trio of colors (vintage photo and crackling campfire distress oxide and forest moss distress ink). I ink blended around the edges with more vintage photo. Next I took a manilla tag and ink blended more vintage photo over it to darken it up. Stamped the sentiment using straight Vintage Photo. If you look closely the black stick tree is on a clear piece of plastic that I die cut with the scallops and circles nesting die set from Unity Stamp Co. from a piece of wrap that was around a stuffed toy we had purchased! It has a ton of trees all over it! I cut another piece from it and will use that later! ;) Next I added the twine (red/green and natural from Timeless Twine by Bella Creationz, the jute twine from May Arts and the gold thread kreinik metallics blending filament)! I loved the look of a tag tie technique that Sandhya used and tried to recreate it! I love how this turned out!


The sponsor list is so amazing! At the end of the week prizes will be awarded! Enter often for a better chance at a prize!!

Unity Stamp Company
Angie Blom Digital Designs
Tawny Owl Paperie
Gina Marie Designs
Jaded Blossom
Colorado Craft Company
Therm O Web
Not 2 Shabby
Gina K. Designs
Newton's Nook Designs
Fresh and Renewed with Teresa
Taylored Expressions
RAM Stamps {Rachelle Anne Miller Stamps}
Graciellie Design
Lawn Fawn
*NEW SPONSOR* Sweet 'n Sassy Stamps
Twiddler's Nook
Pink & Main
A Colorful Life Designs

Good luck to all and I can't wait to see all the inspiration!!
I would love it if you would leave me a note to let me know you were here! :)


{BYSHC} Sketch #53 - Warm Winter Wishes

Hello again friends! As I clean up all the Christmas decorations, I like to take a minute and check out the cards that have been sent. Some ...